Okay, check it. Here’s the Dream Ice Cream post, served up just right, in HTML format. We gonna get this dessert SLAPPIN'.
Alright y’all, gather ‘round! We about to dive headfirst into some SERIOUSLY good stuff. We talkin’ Dream Ice Cream. You know, the kinda treat that hits your soul and makes you wanna do a lil’ happy dance? Yeah, THAT kind. Summer’s here, and ain’t nothin’ better than some homemade ice cream to cool ya down and put a smile on your face. So, ditch that store-bought stuff and let’s get cookin’! We gonna make some magic in the kitchen.
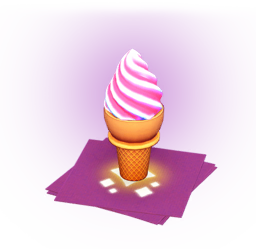
Dream Ice Cream
This ain’t your average ice cream, fam. This is DREAM Ice Cream. It’s like a party in your mouth, a symphony of flavors, a straight-up vacation for your taste buds. Prepare yourselves. Trust me, after you try this, you ain’t goin’ back. We gonna make this recipe so you can have it ready for the block party.
 Here’s what you need to whip up this culinary masterpiece:
Ingredients:
- 1 cup Heavy Cream: Gotta have that richness, ya know?
- 1/2 cup Whole Milk: Keeps it smooth and creamy. No icy chunks allowed!
- 1/4 cup Granulated Sugar: Sweeten things up just right.
- 1/4 teaspoon Vanilla Extract: A touch of magic, adds that classic ice cream flavor.
- 1/4 cup any of your favorite Berries (strawberries, blueberries, raspberries): Fresh is best!
- A pinch of Salt: Sounds weird, but it balances the sweetness. Trust me on this one.
Instructions:
- Prep the Berries: First things first, wash your berries like you about to eat them. If they big, chop them into smaller pieces. We want that berry goodness spread throughout the whole ice cream.
- Combine the Base: In a bowl, whisk together the heavy cream, whole milk, sugar, vanilla extract, and salt until the sugar is completely dissolved. You gotta make sure it’s smooth like your best pick-up line.
- Blend It Up: Now, gently stir in those chopped berries. Don’t overmix! We want chunks, not a berry smoothie. If you are adventurous add a bit of citrus, but don’t overdo it.
- Churn It Up: Pour the mixture into your ice cream maker and churn according to the manufacturer’s instructions. Usually, it takes about 20-25 minutes. If you don’t have an ice cream maker, don’t sweat it! You can freeze it.
- Freeze It: If you used an ice cream maker, transfer the ice cream to an airtight container and freeze for at least 2 hours to harden. If you don’t have an ice cream maker, then place it in a freezer-safe container.
- Serve It Up: Scoop that beautiful Dream Ice Cream into a bowl, top it with some extra berries if you’re feeling fancy, and DIG IN! You can even add a lil’ whipped cream and a cherry on top if you wanna be extra.
And there you have it! Dream Ice Cream, made with love (and a few simple ingredients). This recipe is so easy, even your lil’ cousins can help. So gather your crew, crank up the music, and get ready to make some memories. Enjoy, y’all! You deserve it. Don’t forget to share…or don’t. We ain’t judgin’. Just be sure to enjoy every single, delicious bite. You can try to add cookies or brownies. Sky is the limit, so let your creativity soar! And hey, if you try this recipe, be sure to let me know what you think! We can swap ice cream stories. Now go forth and create some amazing Dream Ice Cream!
If you are looking for Dream Ice Cream - Dreamlight Valley Wiki you’ve came to the right page. We have 1 Pics about Dream Ice Cream - Dreamlight Valley Wiki like Dream Ice Cream - Dreamlight Valley Wiki and also Dream Ice Cream - Dreamlight Valley Wiki. Here it is:
Dream Ice Cream - Dreamlight Valley Wiki
dreamlightvalleywiki.comDream Ice Cream - Dreamlight Valley Wiki
Dream ice cream. dream ice cream